Restrict Access to Your Website from specific countries with .htaccess IP Blocking
Learn How to Restrict Access to Your Website from specific countries with .htaccess IP Blocking in Minutes! Unlock the Power of .htaccess to Allow or Block Visitors from Specific Countries. Let’s Dive In!
After going live, your website becomes globally accessible. Yet, there are instances where managing site access becomes imperative, particularly when safeguarding against spammers and hackers from specific regions.Fortunately, you can use your .htaccess file to allow or block visitors from specific countries. Let’s learn how to do so.
Step 1: Generate the Country’s IP Addresses
Plenty of online tools are available to allow or block visitors according to their country. In this tutorial, we’ll be using IP2Location.
- Head to the IP2Location Firewall IP list tool.
- Select the country you want to block or allow.
- Choose between IPv4 and IPv6 in the IP Version menu.
- Choose the format in the Output Format menu. The choice depends on whether you want to block or allow visitors from those countries.
- Click Download.

- The tool will download the Access Control List (ACL) into your computer.
- If you are using the allow function, make sure to insert the line deny from all above the list of allowed IPs.
Step 2: Insert the Generated IP Addresses into the .htaccess File
Finally, paste the IP addresses of the countries you want to block or allow to .htaccess file. Here’s how to do it using Hostinger’s hPanel:
- Go to Files → File Manager.
- Select your domain and hit Go To File Manager.
- Navigate to the public_html folder and double-click the .htaccess file.
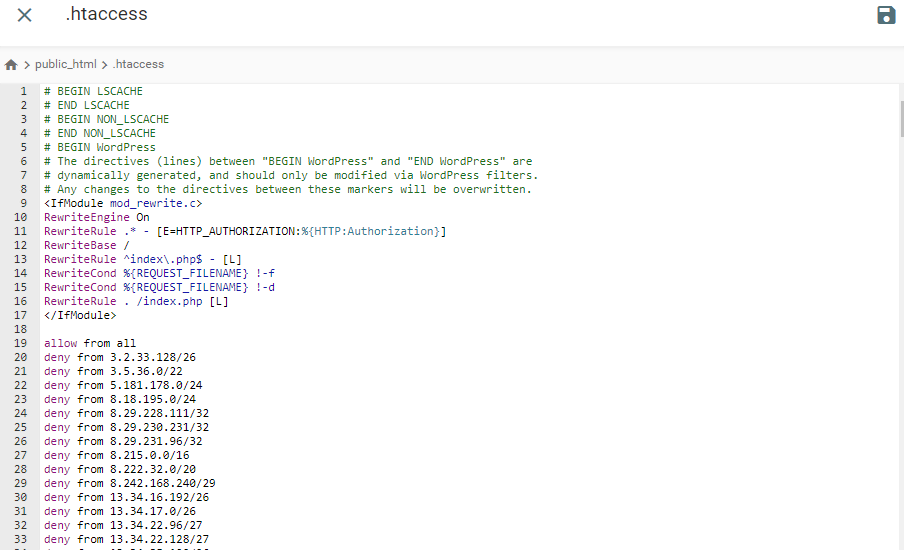
- Open the ACL file on your computer, paste it to your .htaccess file, and hit Save. Your .htaccess file will look like this:

You can also use an FTP client to edit the .htaccess file.

Conclusion :
Congratulations on mastering the art of controlling visitor access based on their country! By harnessing the power of IP2Location to obtain country-specific IP addresses and integrating ACL into your .htaccess file, you’ve gained valuable control over your website’s security.
We trust this tutorial has been enlightening. Should you have any queries or require further assistance, please feel free to drop us a message . We’re here to help!


